
Engagement and Communication
This guide covers the communication tools your team can use to receive prayer requests, send announcements, and stay connected inside TheFaithApp. These tools include:- Prayer requests
- Public prayer request forms
- Segmented communications and weekly briefs
- SMS conversations and text-to-join keywords
- Church campaign seasons
- Direct messages
- Group chats
- Group invitations
- Favorites and bookmarks
Before You Start
- Sign in to your admin account.
- Open
Prayer Requests,Communications, orChatfrom the left sidebar depending on the task you want to complete. - Keep public links ready before you share them outside the admin dashboard.
- Review new requests and conversations regularly so follow-up does not stall.
Prayer Requests
Use the prayer requests workspace to review submitted requests, track follow-up status, and share a public prayer request form.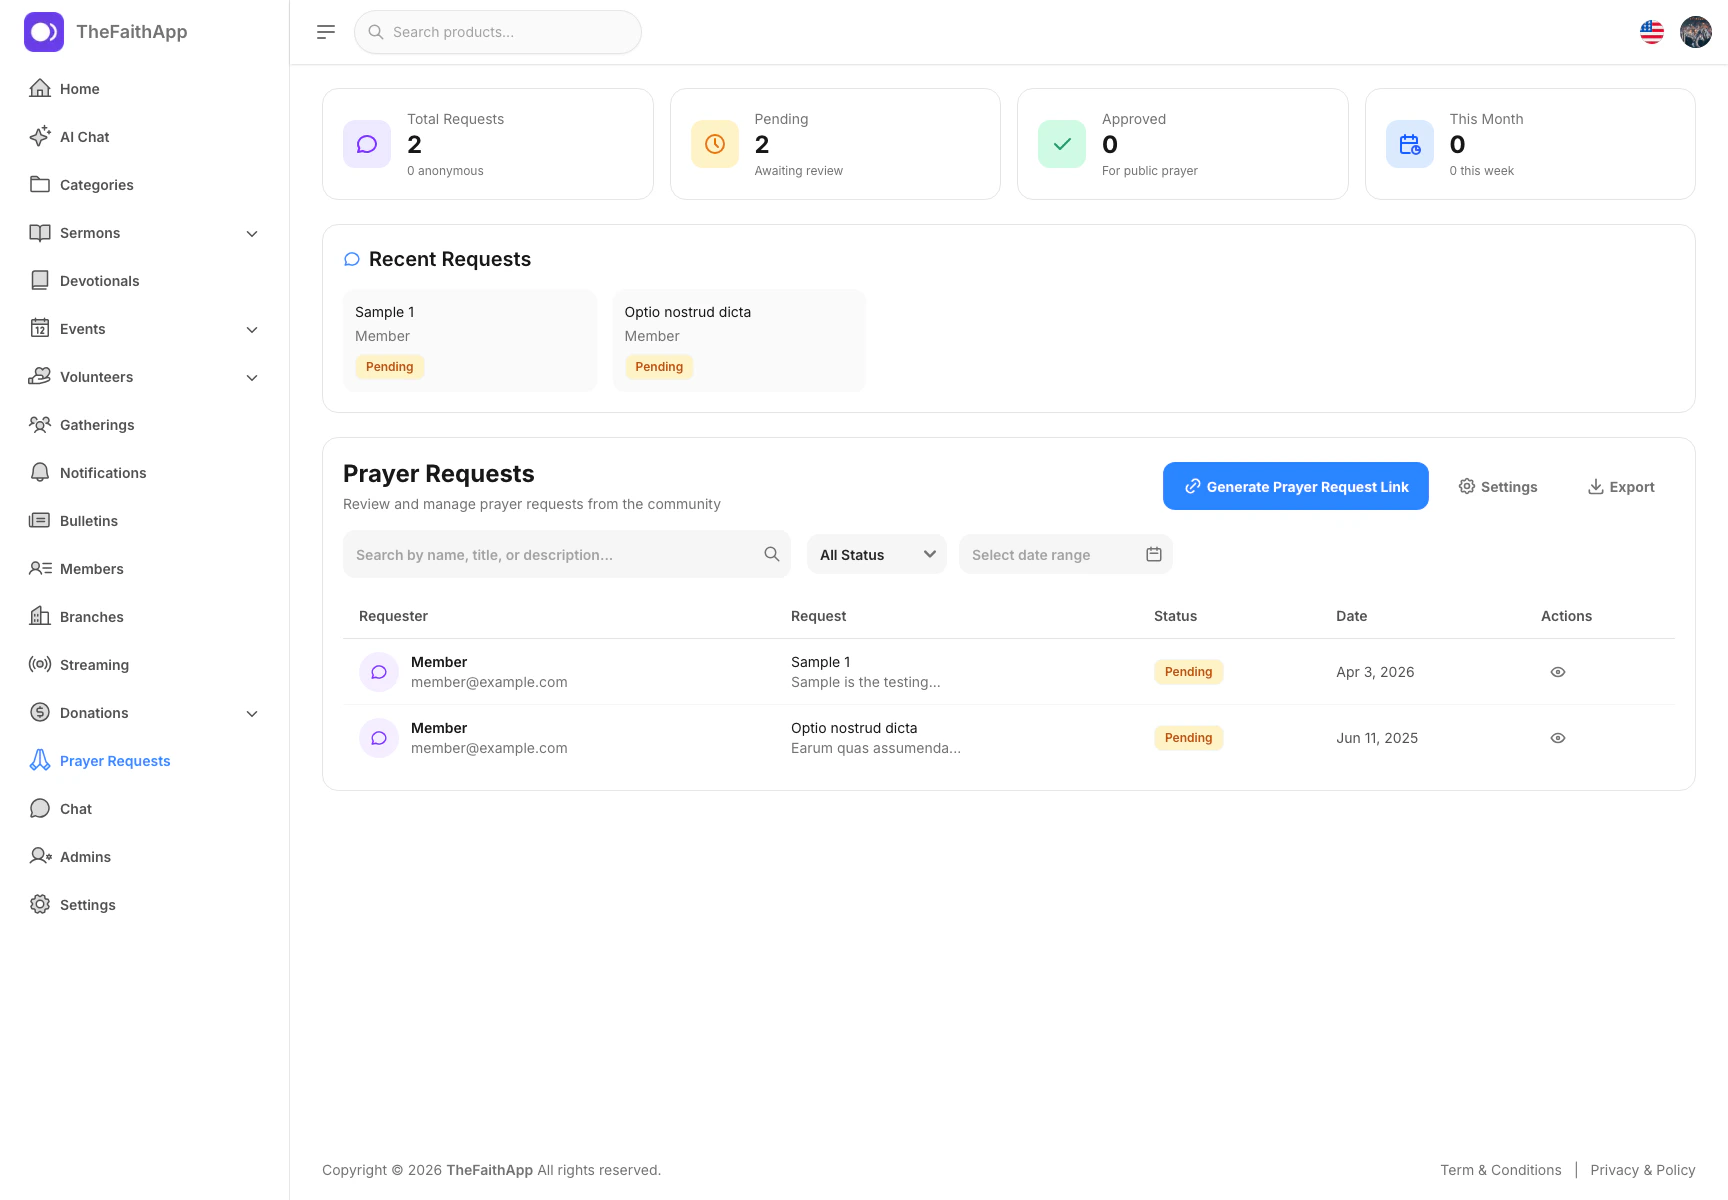
What You Can Do
- Review prayer request totals
- See recent requests quickly
- Search requests
- Filter by status
- Filter by request audience
- Filter by urgency status
- Filter by date range
- Open an individual request
- Export the current list
- Generate a public prayer request link
- Update prayer request settings
Steps
- Open
Prayer Requests. - Review the summary cards and the recent requests section at the top.
- Use search, status, audience, or date filters to narrow the request list.
- Click the view icon when you need the full request details.
- Use
Export,Generate Public Link, orSettingswhen needed.
Notes
- The request list is the main place for ministry teams to review incoming needs.
- Status updates make it easier for several team members to stay aligned on follow-up.
Reviewing a Prayer Request
Use the request drawer when you need the full message and want to update the follow-up status.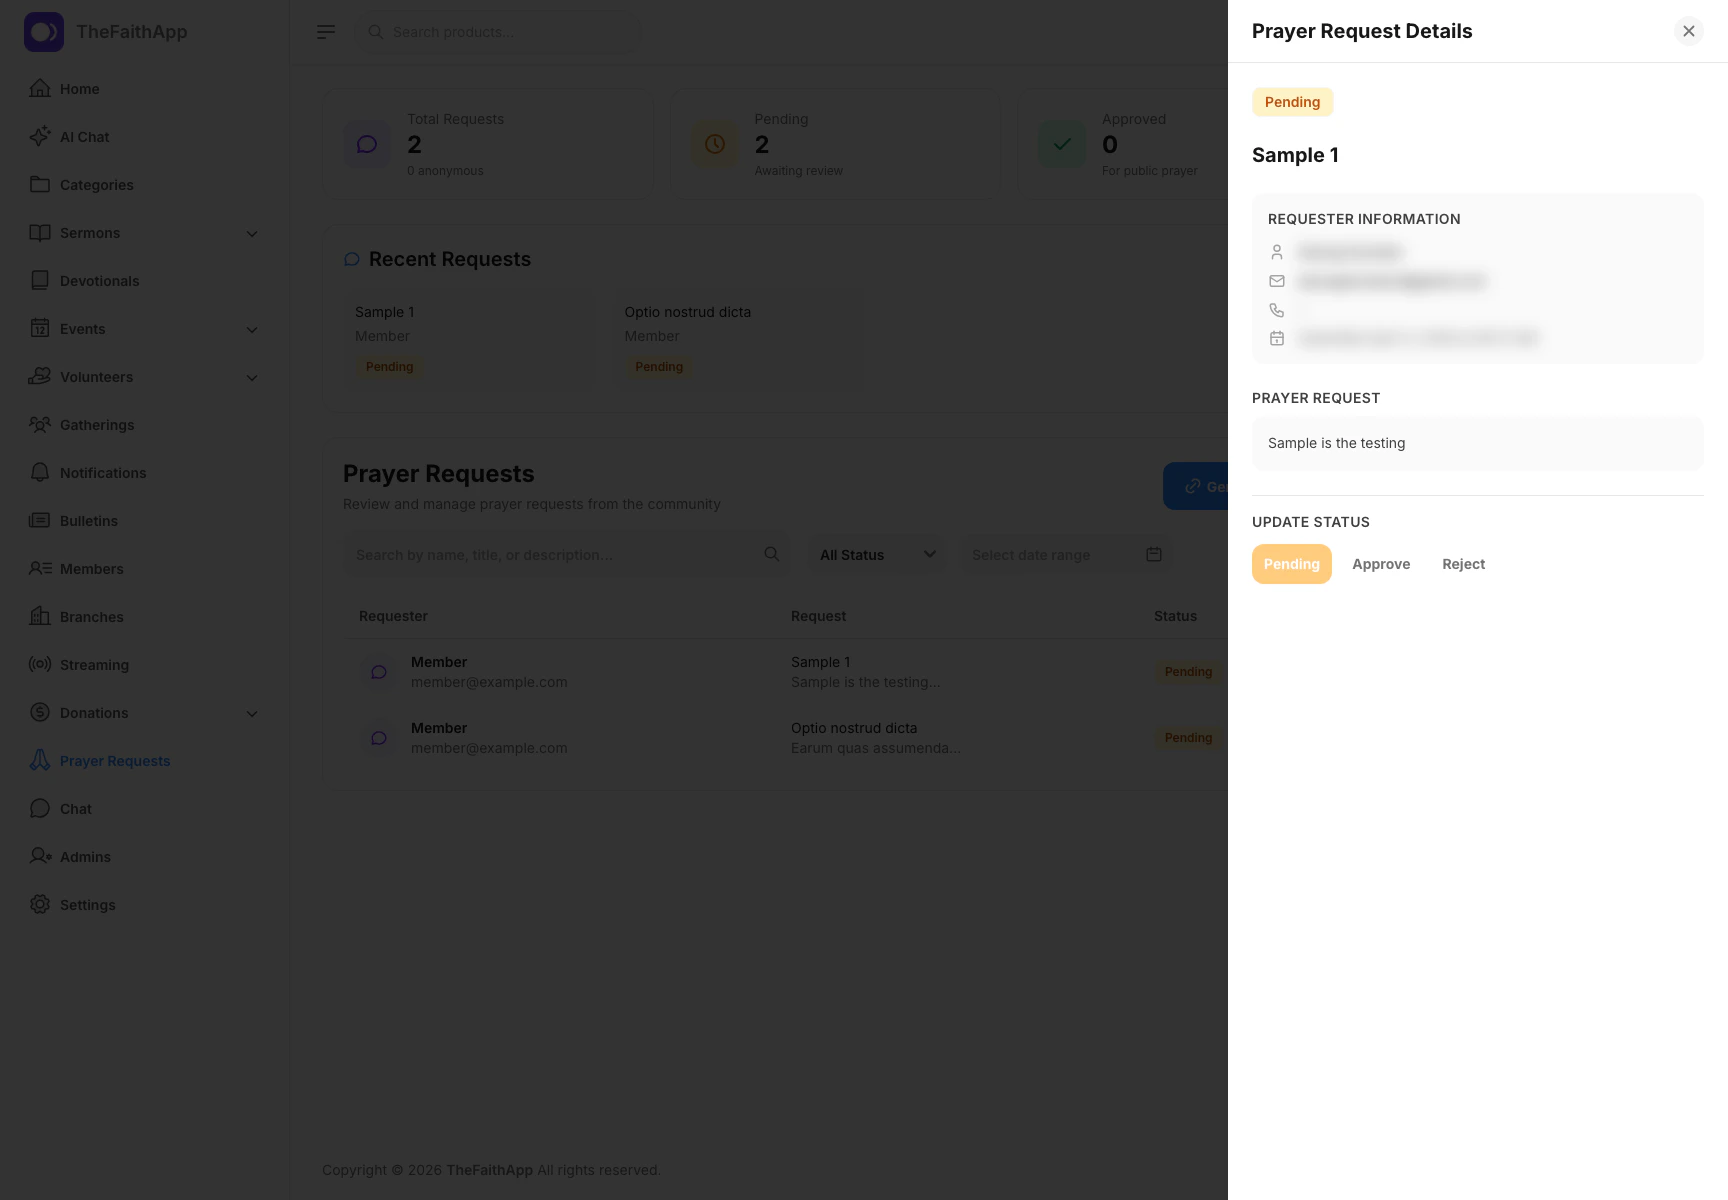
What You Can Do
- Read the full request
- Review requester details
- Confirm whether the request is for the Church Prayer Wall, a Community Group, church leaders, or the pastoral team
- See answered and withdrawn request state
- Update the request status
- Review a member’s private request for urgent follow-up
- Assign an urgent response owner and track acknowledgement, work, and resolution
- Create a locked Prayer Room with an eligible verified prayer-team leader
- Create and update a bounded Pastoral Care handoff
- Review pastoral access history when the request uses the restricted pastoral-only audience
Steps
- Open
Prayer Requests. - Click the view icon for the request you want to review.
- Read the message and confirm the requester details.
- Update the status based on your current follow-up stage.
- Review the member’s private reason and approve or decline the urgency request.
- Assign a staff owner when follow-up is needed.
- Record when the need is acknowledged, in progress, and resolved.
- If live prayer is appropriate, choose an eligible verified prayer-team leader and create a private Prayer Room.
- If broader care coordination is needed, create a Pastoral Care handoff with a reason, owner, and short coordination note.
Notes
- This view is useful for pastors, prayer teams, and follow-up coordinators.
- Recent requests at the top of the main page can also be opened from there.
- A withdrawn request cannot be returned to a member Prayer Wall.
- Member prayer journals remain private and never appear in this workspace. Only a request the member deliberately shares from a journal enters the normal review list.
- Urgency is private and does not appear as a badge on the member Prayer Wall.
- Urgent notifications contain a safe general message rather than the prayer text, requester identity, contact details, or private reason.
- The Pastoral Care handoff records coordination metadata only. It does not copy prayer or contact details, and it is not a full confidential care case.
- Pastoral-only requests require both Prayer Requests and Private Pastoral Prayer Requests access. Their content is encrypted, excluded from general search and export, and never shared into Prayer Walls, prayer teams, Prayer Rooms, or AI tools.
- When the pastoral audience filter is selected,
Export metadatadownloads workflow fields only and records the export in the request’s access history.
Public Prayer Request Links
Use the public link tool when your church wants people to submit requests without entering the admin dashboard.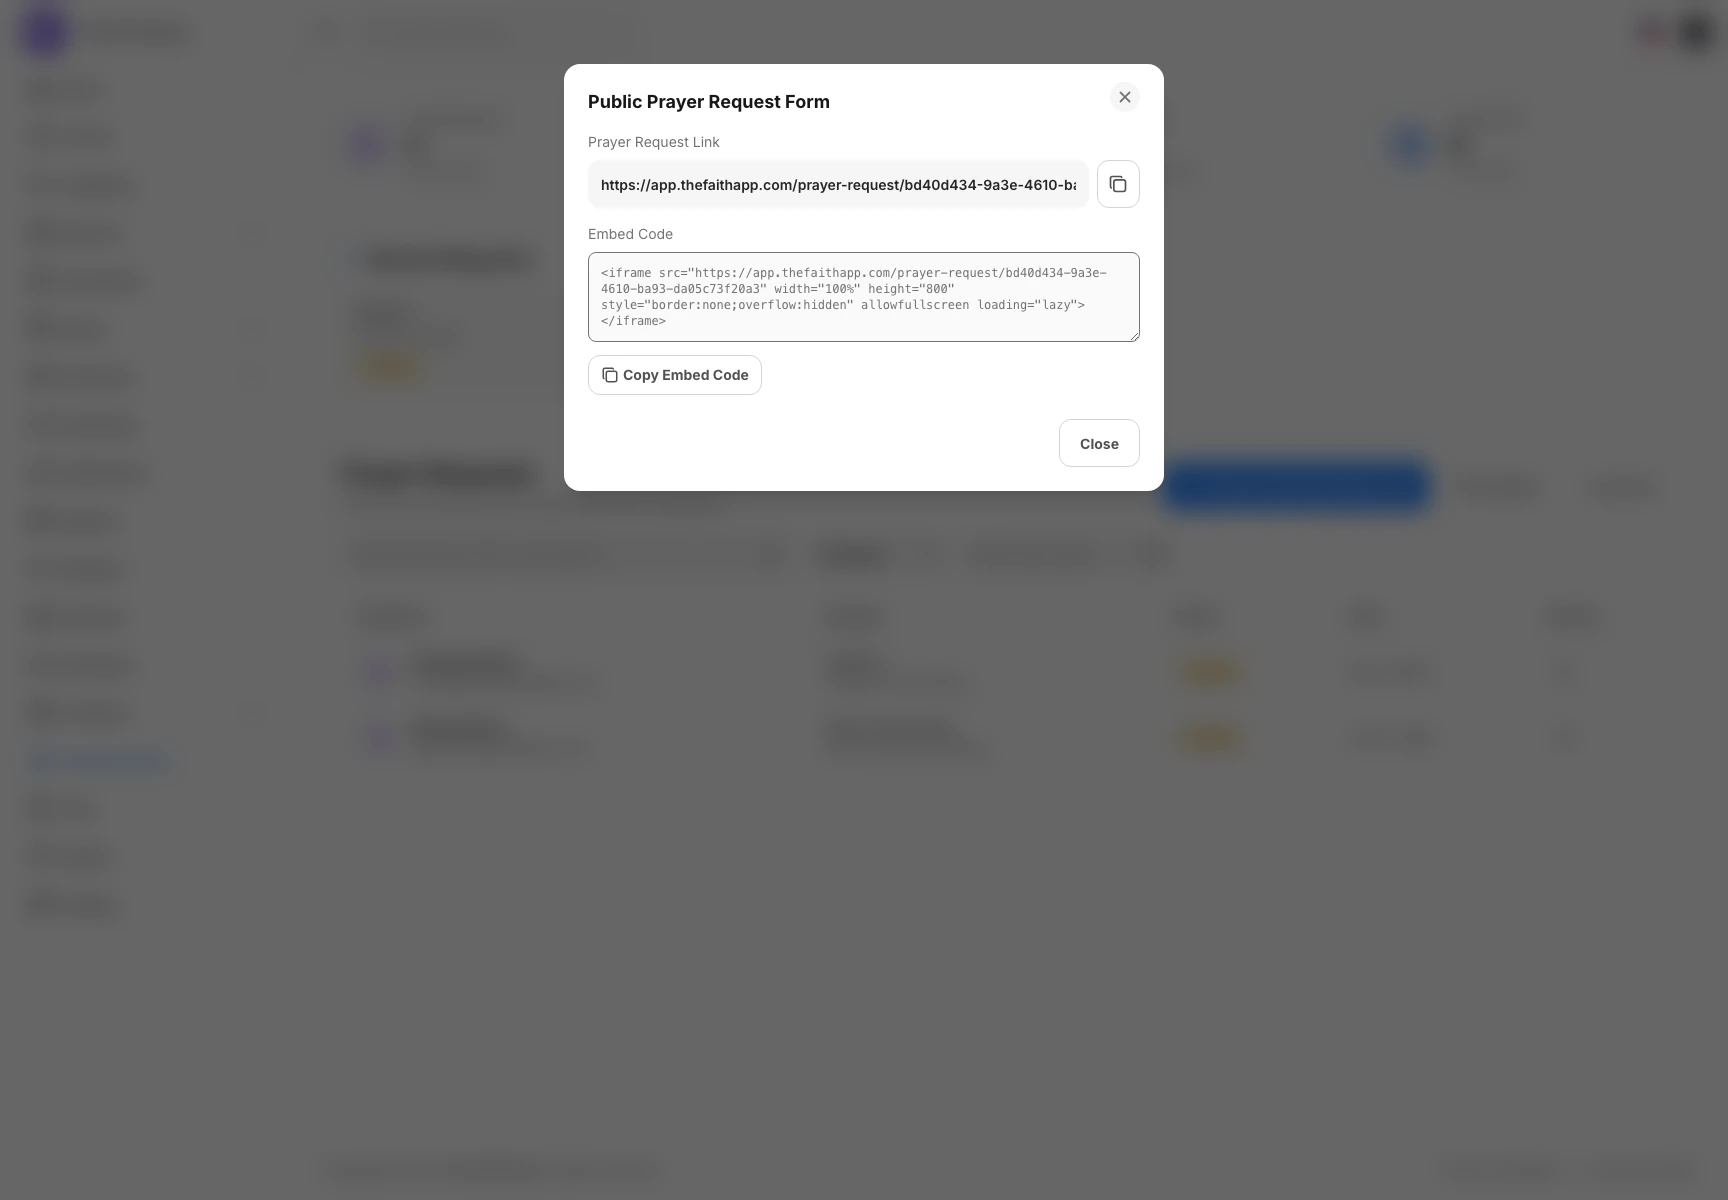
What You Can Do
- Copy the public prayer request link
- Copy embed code for another website
- Share one destination for members, visitors, or livestream viewers
Steps
- Open
Prayer Requests. - Click
Generate Public Link. - Copy the direct link or the embed code.
- Share it where people already reach your church online.
Notes
- Public requests still flow back into the main prayer request review list.
- Public-form requests default to church leaders only and do not automatically appear in a member Prayer Wall.
- The embed option is useful when you want the form placed inside a church website.
Public Prayer Request Page
Use the public page to collect requests from members, visitors, or online viewers.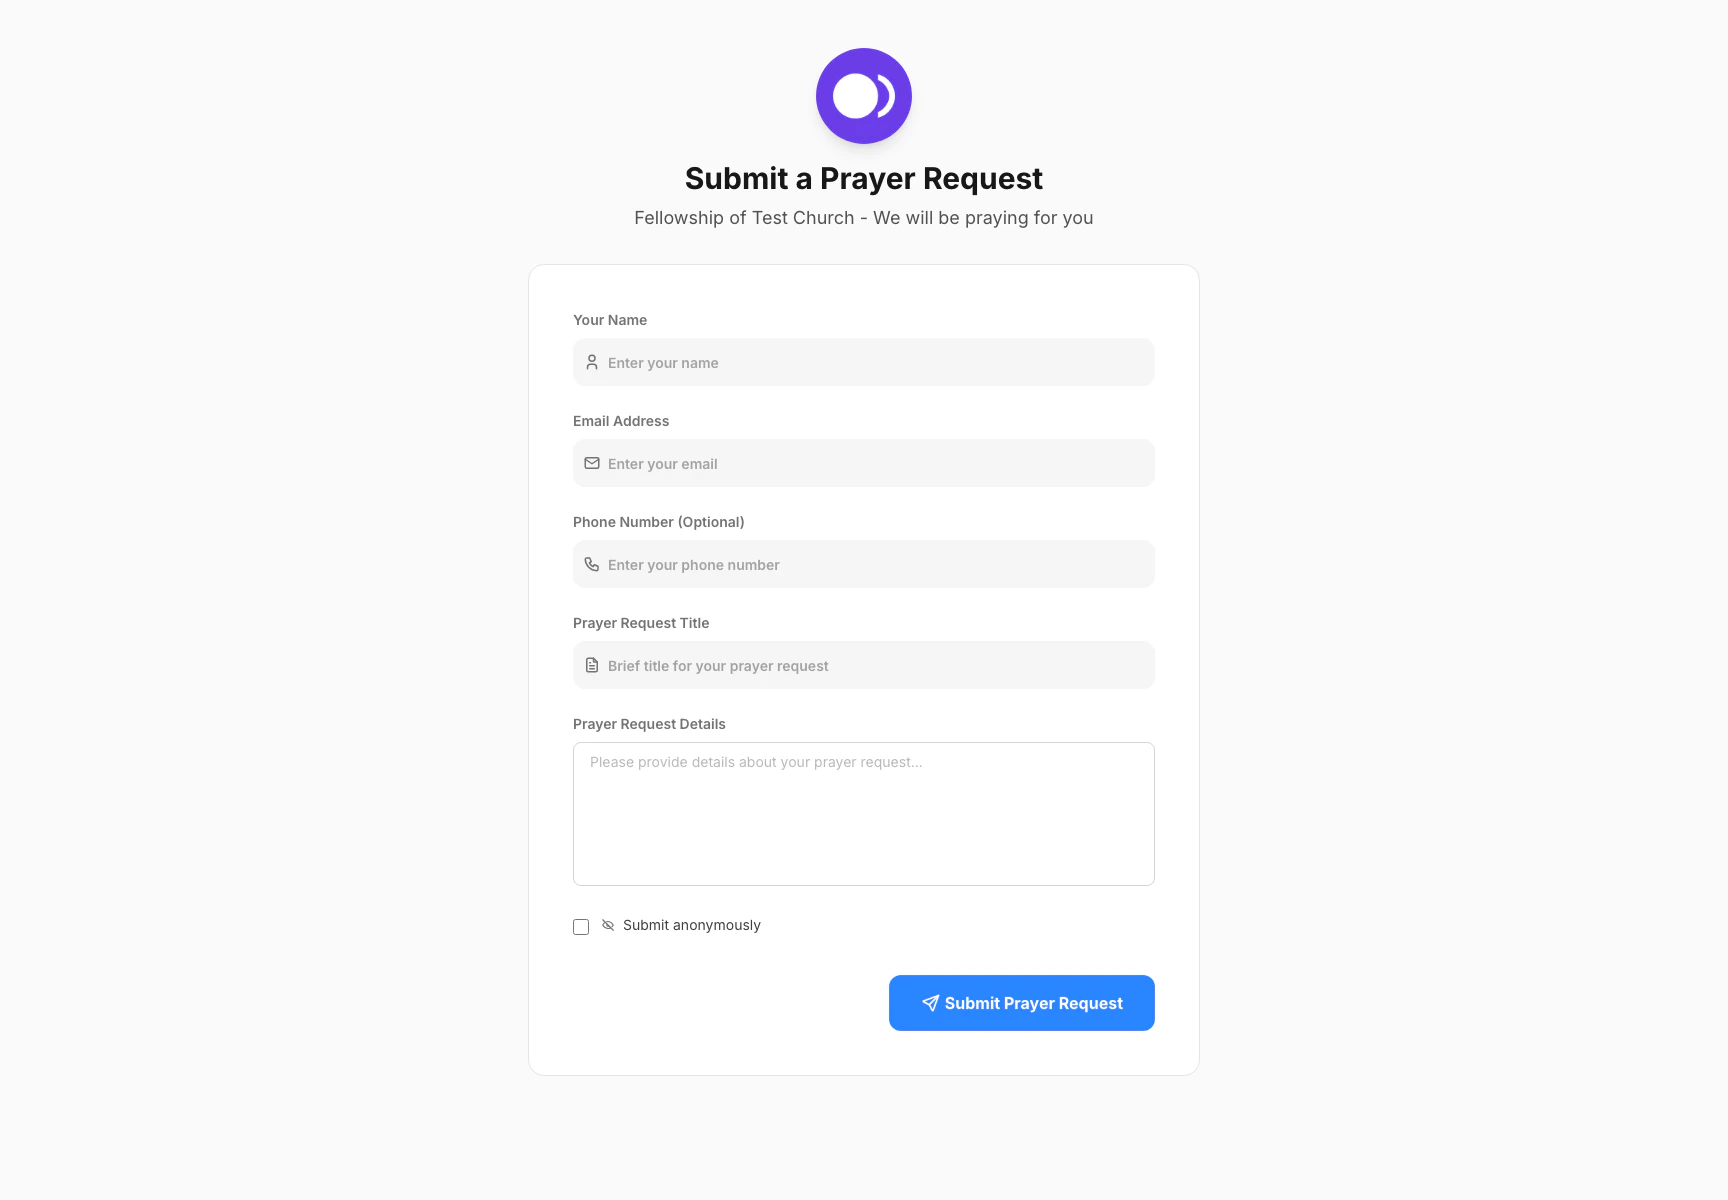
What You Can Do
- Submit a prayer request outside the admin dashboard
- Collect contact details for follow-up
- Give people a simple support path from a website or shared link
Steps
- Generate or copy the public prayer request link from the admin dashboard.
- Share the link anywhere people already connect with your church.
- Open the page outside the dashboard.
- Fill in the request details and submit the form.
Notes
- Review this inbox regularly so public requests receive timely follow-up.
Communications
Use the Communications workspace to prepare an announcement, choose who should receive it, and review its delivery history.Send an Announcement
- Open
Communicationsand stay onCompose & history. - Choose
Announcement,Weekly church brief, orCampaign update. - Add the title and message.
- Choose an audience such as all members, a campus, Community Group, ministry, volunteer team, member stage, event attendees, parents, recent guests, or campaign participants.
- Click
Preview audienceand confirm the member and guest counts. - Choose the available in-app, push, email, SMS, or WhatsApp channels.
- Save a draft for review or select
Publish now.
Build a Weekly Church Brief
- Choose
Weekly church briefas the message type. - Add an optional prayer focus or important announcement.
- Select
Generate brief. - Review the collected events, serving schedule, Community Group updates when the brief targets one group, sermon recap, giving and outreach updates, and volunteer needs.
- Edit the title or message before publishing.
Send an Emergency Alert
Turn onEmergency communication only when normal quiet choices and message
limits must be bypassed. Add the required reason, confirm the selected audience,
and publish. Emergency mode does not expand the audience or create missing
contact permission.
SMS Inbox and Text-to-Join
OpenSMS inbox to read inbound messages and reply through the church’s
connected SMS number. The same area lets staff create a keyword such as
PRAY or JOIN. A person who texts the keyword receives the church’s
confirmation and can text STOP to unsubscribe or START to renew consent.
Member Choices
Members can open Communication preferences from Notifications in the mobile app. They can choose non-critical topics, delivery channels, quiet hours, and daily or weekly message limits. Emergency alerts are not counted against those limits. Email, SMS, WhatsApp, and push require the church’s corresponding provider to be configured. In-app delivery remains available without an external provider.Church Campaigns
Use a church campaign for a focused season such as 21 days of prayer, missions month, Serve Week, or an Easter invitation.- Open
Communications, thenChurch campaigns. - Add the campaign title, summary, optional theme, and dates.
- Link a devotional, event, giving fund, Outreach Campaign, Bible plan, form, or prayer focus.
- Save the draft, review it, and publish it.
Chat Workspace
Use chat to keep one-to-one and group conversations active across the admin dashboard and the mobile app.
What You Can Do
- Switch between
PersonalandGroups - Search conversations from the chat list
- Review the latest message and time for each room
- Read and reply to messages
- See unread activity when new messages arrive
- Open a room and continue the conversation
- Start a new chat from the admin dashboard when your role allows it
Steps
- Open
Chat. - Use
PersonalorGroupsto switch conversation types. - Select the conversation you want from the list.
- Read the latest messages in the thread.
- Type your reply, attach a supported file, or attach a sermon.
- Send the message.
Notes
- The shared chat workspace keeps direct messages and group threads in one place.
- Messages update in realtime between the admin dashboard and mobile app.
- Group chats work well for ministry teams, church-wide updates, internal coordination, and recurring planning.
Direct Messages
Use direct messages when you need a one-to-one conversation with a member or another user.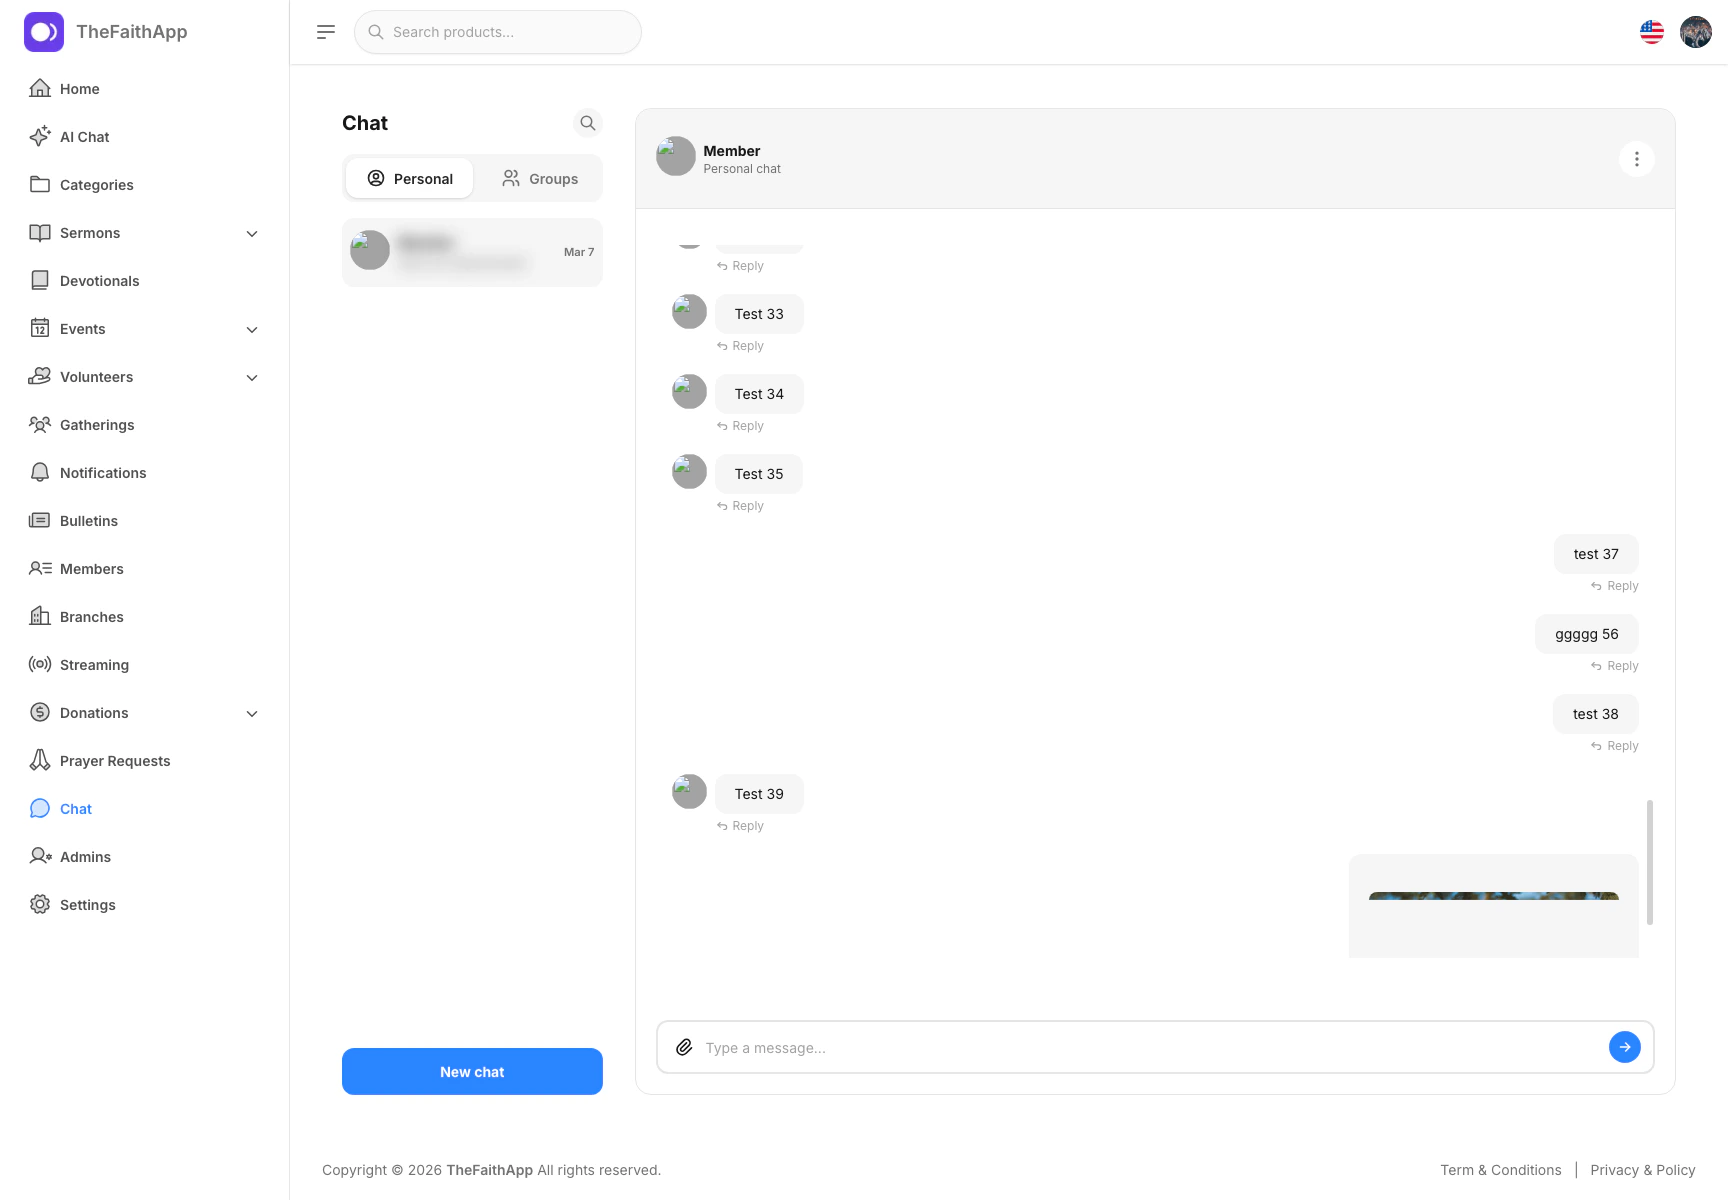
What You Can Do
- Open an existing direct message
- Continue a private conversation
- Reply inside the same thread
Steps
- Open
Chat. - Stay on
Personal. - Select the conversation you want to open.
- Type your message and send it.
Notes
- Direct messages are best for one-to-one follow-up, coordination, or support.
- Direct message notifications follow the recipient’s chat notification preferences.
Group Chat Messages
Use group chats when several members need to follow the same conversation.
What You Can Do
- Read messages grouped by date
- See read receipts such as
Seen by 1orSeen by 5 - Reply to a specific message
- React with quick faith-community reactions
- Mention another member in a group
- Play sermon attachments from the message
- Listen to voice notes
- Delete messages when your role allows moderation
Steps
- Open
Chat. - Click
Groups. - Open the group you want.
- Scroll up to review older messages.
- Use
Replywhen you want your response linked to a message. - Use a reaction when a short response is enough.
- Type
@and choose a member when you need to mention someone.
Notes
- New messages appear without refreshing the page.
- The unread divider marks where new activity begins when you return to a room.
- Mentioned members receive stronger chat attention based on notification settings.
Attachments, Voice Notes, and Sermons
Use attachments when a conversation needs more than text.
What You Can Do
- Send supported image attachments
- Send supported PDF attachments
- Preview images from the chat room
- Open PDFs from the chat room
- Attach audio or video sermons
- Play sermon attachments from the chat card
- Send and play voice notes on mobile
Steps
- Open the chat room.
- Click or tap the attachment icon for an image or PDF.
- Choose the file and wait for the upload to finish.
- Use the sermon icon when you want to attach a sermon.
- Search for the sermon and select it.
- Send the message.
Notes
- Chat file attachments currently support images and PDFs.
- Sermon attachments open in the mobile app player on mobile.
- On web, sermon attachments use browser playback controls.
- Upload progress appears before the message finishes sending.
Group Info and Members
Use the group info drawer to review members and shared content from one place.
What You Can Do
- Review the group name
- Confirm whether the group is public or private
- See the current member count
- Review members
- Load more members in larger groups
- Review shared photos
- Review shared PDF files
- Review shared sermons
- Open shared files or sermons from the drawer
- Mute or moderate members when your role allows it
Steps
- Open
Chat. - Click
Groups. - Open the group conversation you want.
- Click the group header.
- Use
Members,Photos,Files, orSermonsto review the shared group history. - Open a shared photo, PDF, or sermon when you need to preview it.
Joining Public Groups
Use public groups when members should be able to read a room before joining the conversation.What You Can Do
- Open a public group from the chat list
- Read the existing conversation
- Review group details before joining
- Join the group when you want to participate
Steps
- Open the mobile app.
- Go to
Chat. - Open the public group you want to view.
- Review the messages or group details.
- Tap
Joinwhen you want to send messages in that room.
Notes
- Members who have not joined can read the room, but they do not see the message input until they join.
Chat Notification Preferences
Use notification preferences when a room is useful but temporarily too busy.What You Can Do
- Keep notifications on for important rooms
- Mute a room for a short period
- Mute a room for the day
- Turn off room notifications when needed
- See which mute option is currently selected
Favorites and Bookmarks
Use favorites and bookmarks as member-side save-for-later tools inside the app experience.What You Can Do
- Save content for quick return later
- Help members keep track of meaningful sermons or devotional content
- Support follow-up when a member says they saved an item to revisit
Notes
- Favorites and bookmarks are member-facing features rather than a separate admin workspace.
- The current web dashboard does not expose a standalone favorites or bookmarks management page.
Current Product Notes
- The admin pages reviewed for this guide include prayer requests, communications, SMS conversations, church campaigns, direct messages, group chats, room details, and chat moderation actions.
- Chat rooms are created and managed from the admin experience.
- Favorites and bookmarks remain member-facing saved-item features.