Church Operations
This guide covers the main church administration tools used to manage people, locations, schedules, and internal access. These tools include:- Members
- Member imports
- Import history and undo
- Branches
- Gatherings
- Admin accounts
- Roles and permissions
Before You Start
- Sign in to your admin account.
Members,Branches,Gatherings, andAdminsare in the left sidebar.- Some account-management actions depend on your own admin level.
Members
Use Members to manage your church member directory and review engagement status.
What You Can Do
- Review total, active, inactive, and new member counts
- Search the directory
- Filter by gender and activity status
- Open a member profile to see more details
- Resend an invite to members who have not logged in yet
Steps
- Click
Membersin the left sidebar. - Use the search field to find a member by name or email.
- Use the gender and status filters when needed.
- Click the view icon to open the member details drawer.
- Use the resend invite action for members who still need access.
Notes
- Member status is based on recent login activity.
- The view drawer shows contact, personal, location, and account details.
Member Imports
Use the import flow when you need to add many members at once from a CSV file.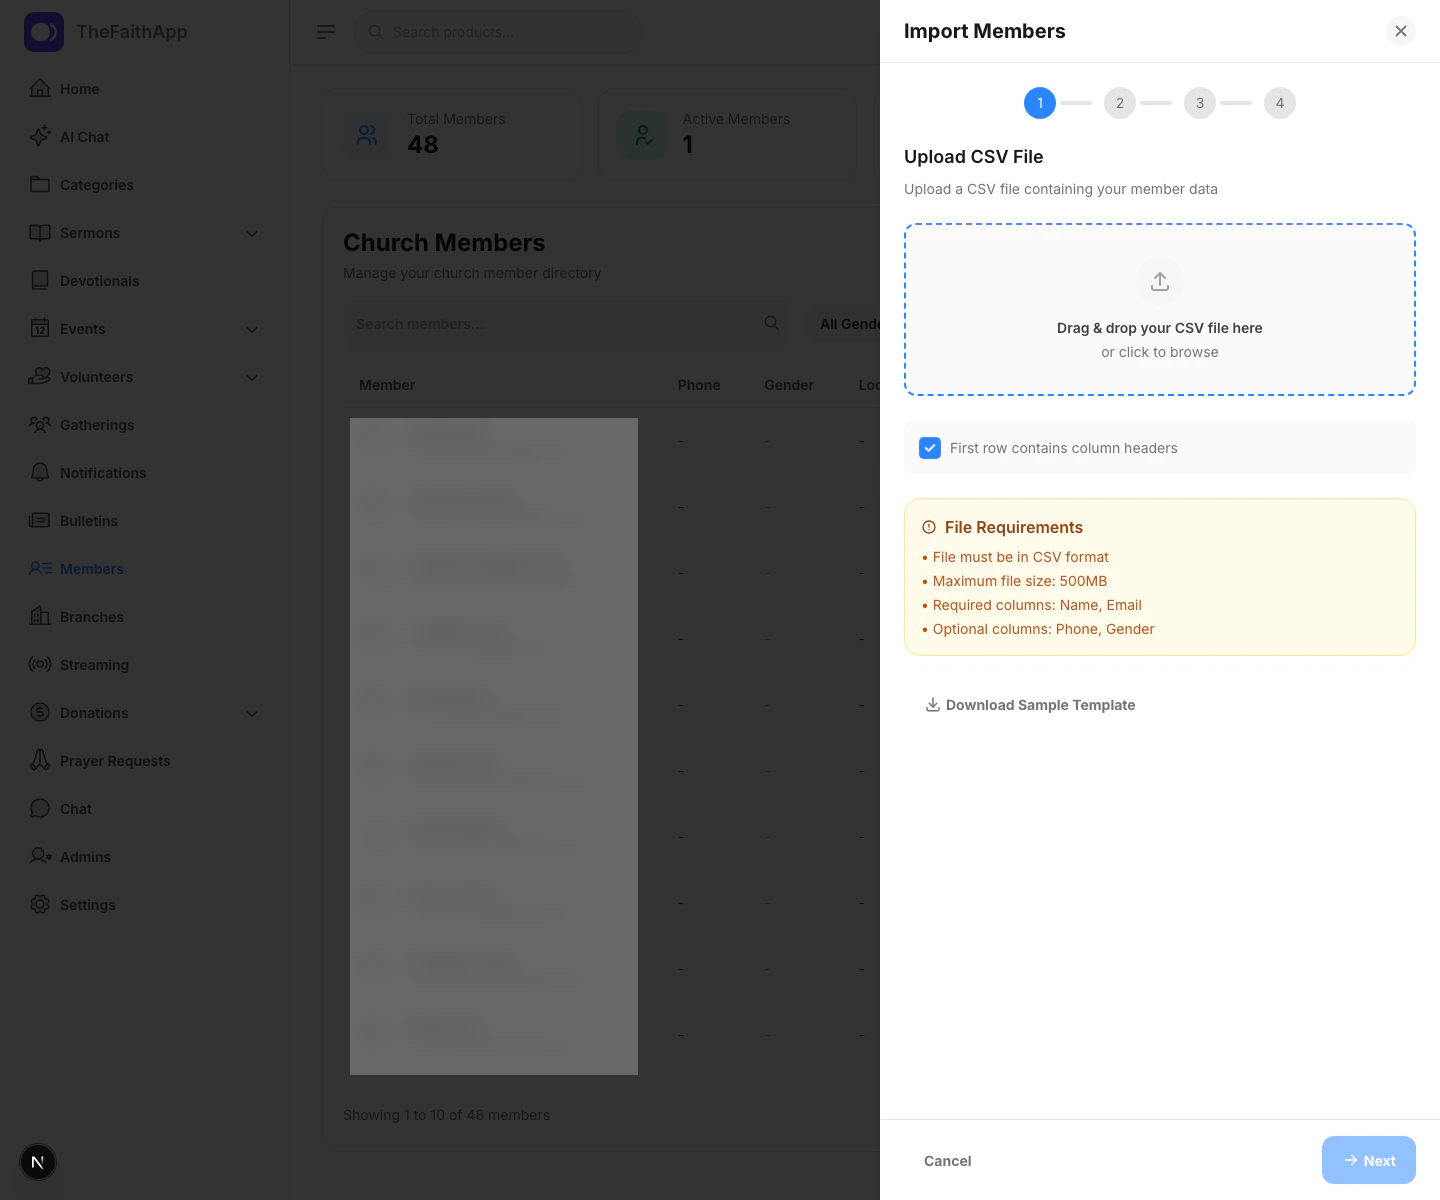
What You Can Do
- Upload a CSV file
- Confirm whether the first row contains headers
- Download a sample template
- Map CSV columns before processing the import
CSV Requirements
- File type must be CSV
- Required columns are
NameandEmail - Optional columns include
PhoneandGender
Steps
- Open
Members. - Click
Import Members. - Upload the CSV file.
- Confirm whether the first row contains column headers.
- Continue to the mapping step.
- Match each required field to the correct CSV column.
- Review the sample data preview.
- Start the import.
Result
- The system processes the file and shows imported, skipped, and failed totals.
Import History And Undo
Use Import History to review past member uploads and undo a completed import if needed.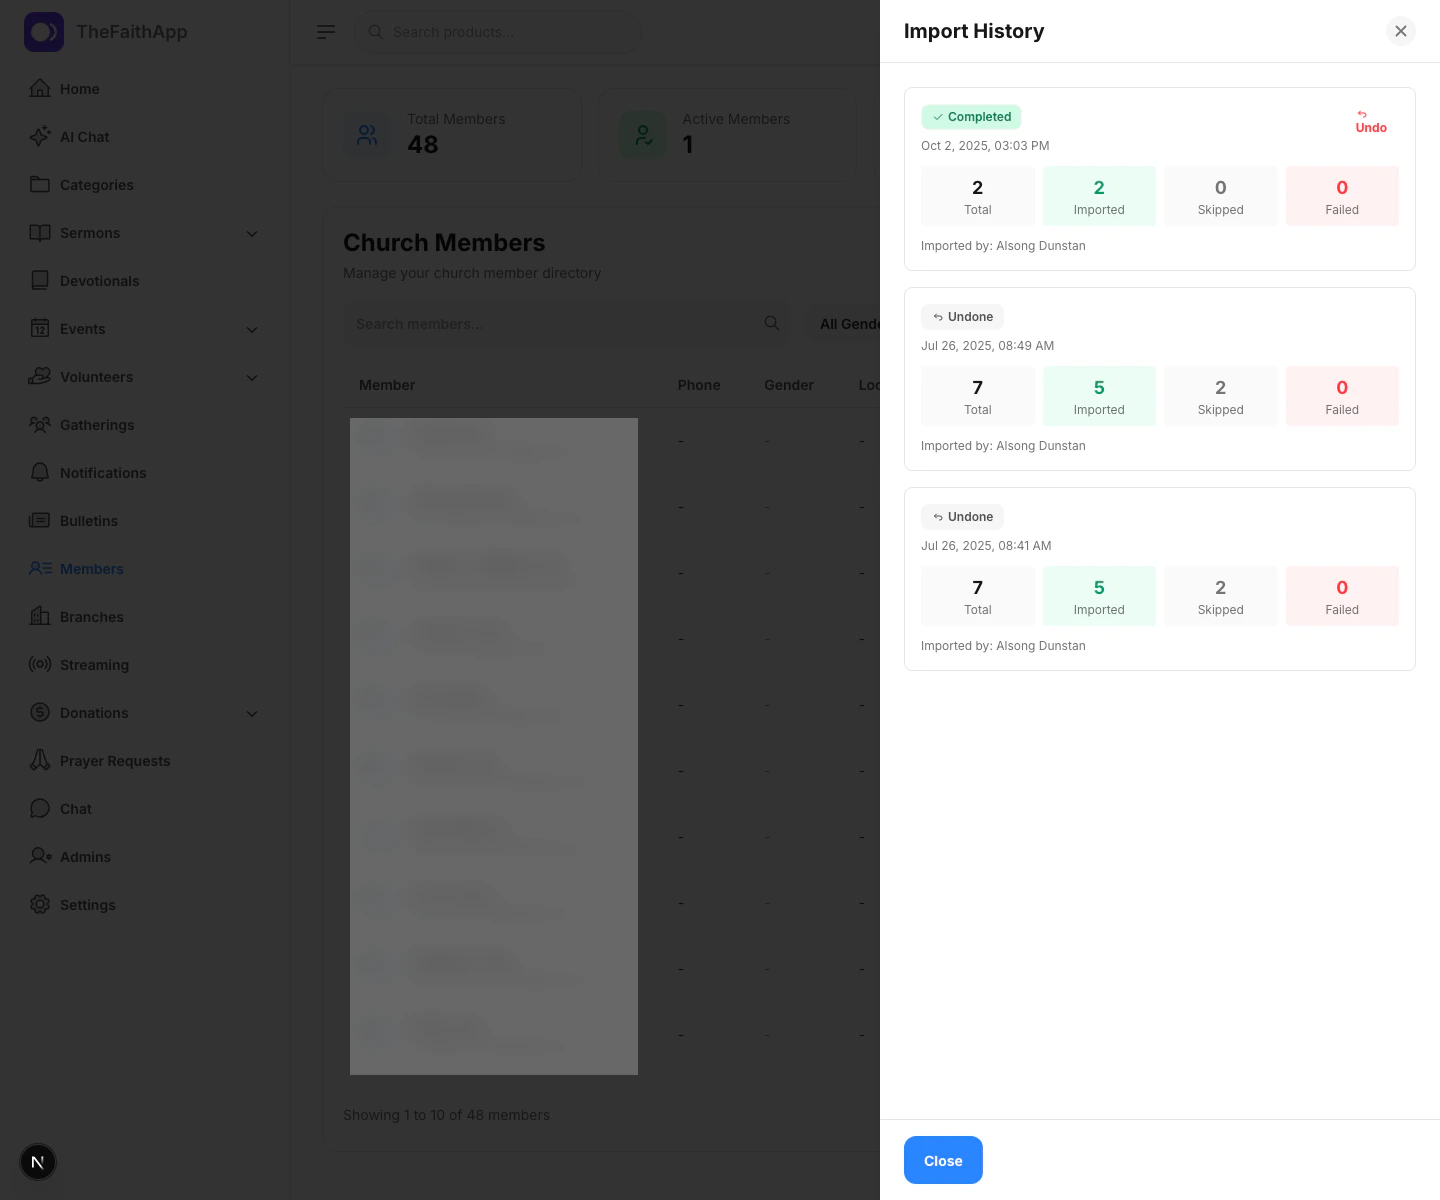
What You Can Do
- Review past imports
- See totals for imported, skipped, and failed rows
- Undo a completed import that created members
Steps
- Open
Members. - Click
Import History. - Review the import status and totals.
- Click
Undoon a completed import if you need to reverse it. - Confirm the undo action.
Notes
- Undo is only available for completed imports that successfully created members.
- The member directory refreshes after an undo is completed.
Branches
Use Branches to manage church campuses or locations.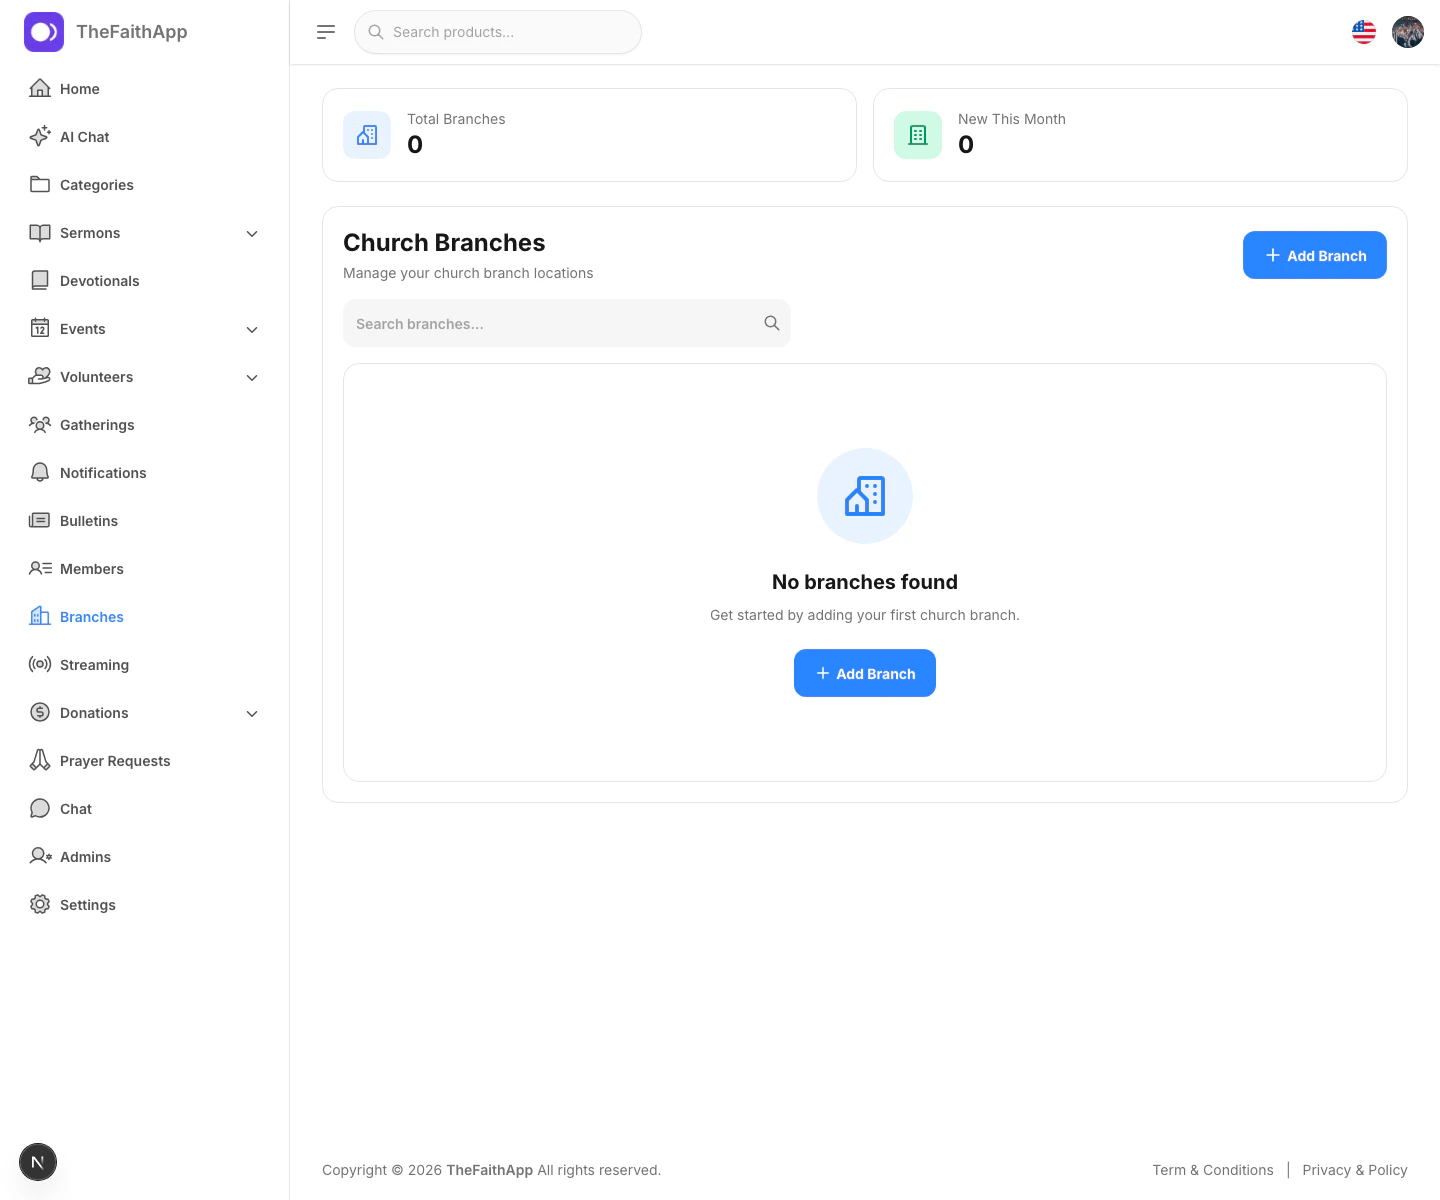
What You Can Do
- Create a branch
- Search branches
- Edit branch details
- Delete a branch
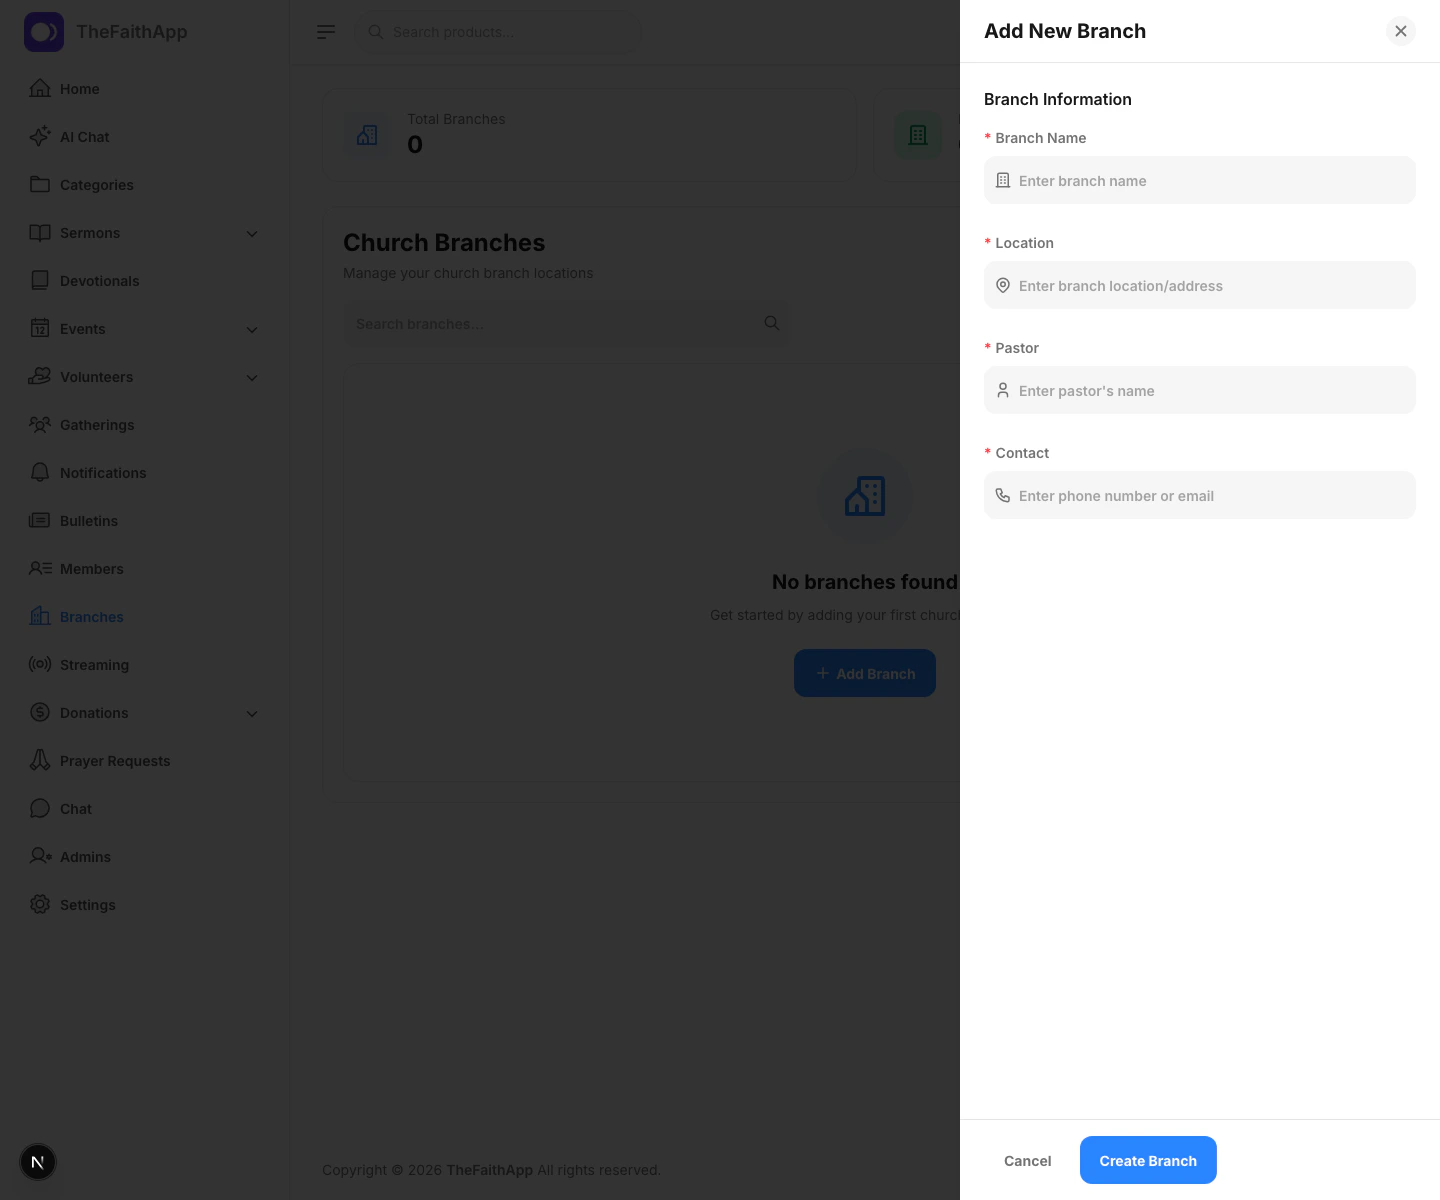
Branch Details
- Branch name
- Location
- Pastor
- Contact
Steps
- Click
Branchesin the left sidebar. - Click
Add Branch. - Enter the branch details.
- Save the branch.
- Use the edit or delete actions from the list when updates are needed.
Notes
- If no branches exist yet, the page shows an empty state with a direct
Add Branchaction.
Gatherings
Use Gatherings to manage recurring church services and meetings.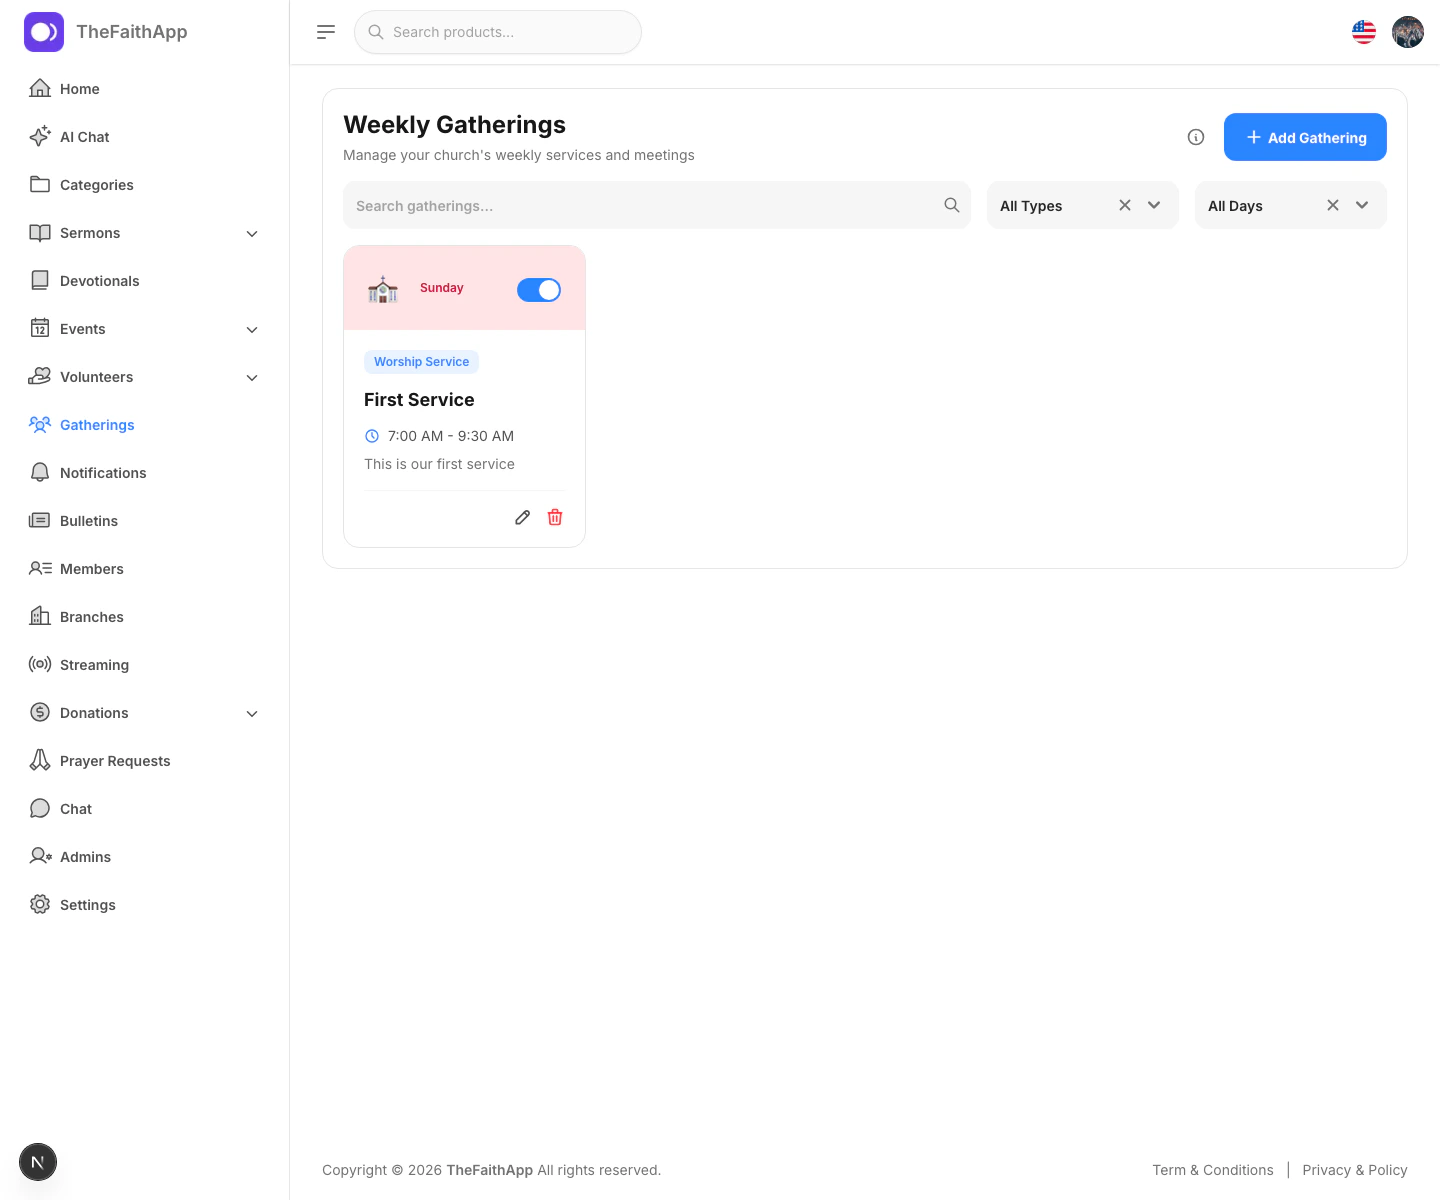
What You Can Do
- Create a new gathering
- Search gatherings
- Filter by type or day
- Edit or delete a gathering
- Turn gatherings on or off with the active toggle
- View the list of available gathering types
Gathering Details
- Gathering type
- Gathering name
- Day of the week
- Start time
- End time
- Description
- Active status
Steps
- Click
Gatherings. - Click
Add Gathering. - Choose the gathering type.
- Enter the name, day, and time range.
- Add an optional description.
- Save the gathering.
- Use the active toggle when you want to temporarily hide or reopen a regular gathering.
Roles And Permissions
Use Roles and Permissions to control what each internal team role can access.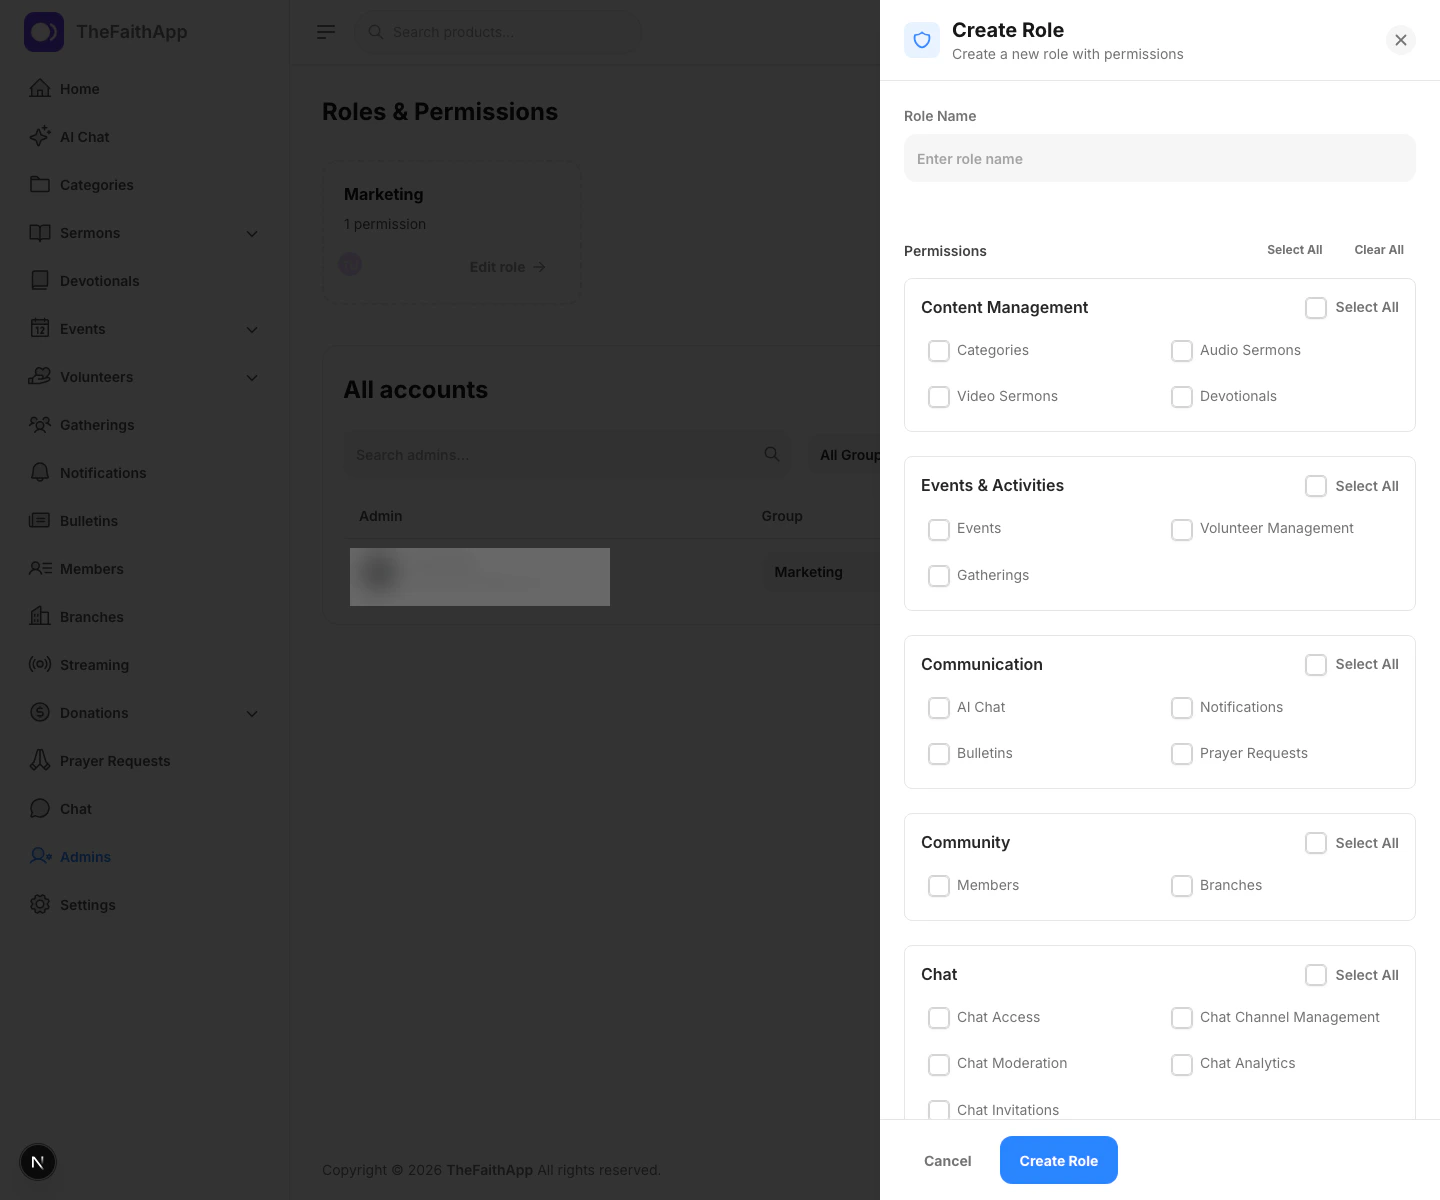
What You Can Do
- Create a new role
- Edit an existing role
- Assign permissions by category
- Select all permissions in one category
- Select all or clear all permissions across the whole role
Permission Areas
- Content management
- Events and activities
- Communication
- Community
- Chat
- Media and finance
- Marketing
- Administration
Steps
- Click
Adminsin the left sidebar. - In
Roles & Permissions, clickCreate role. - Enter the role name.
- Select the permissions the role should have.
- Save the role.
Notes
- Roles are used when assigning or updating admin accounts.
- Existing roles can be opened again to adjust permissions later.
Admin Accounts
Use Admins to manage internal staff and assign them to the right role.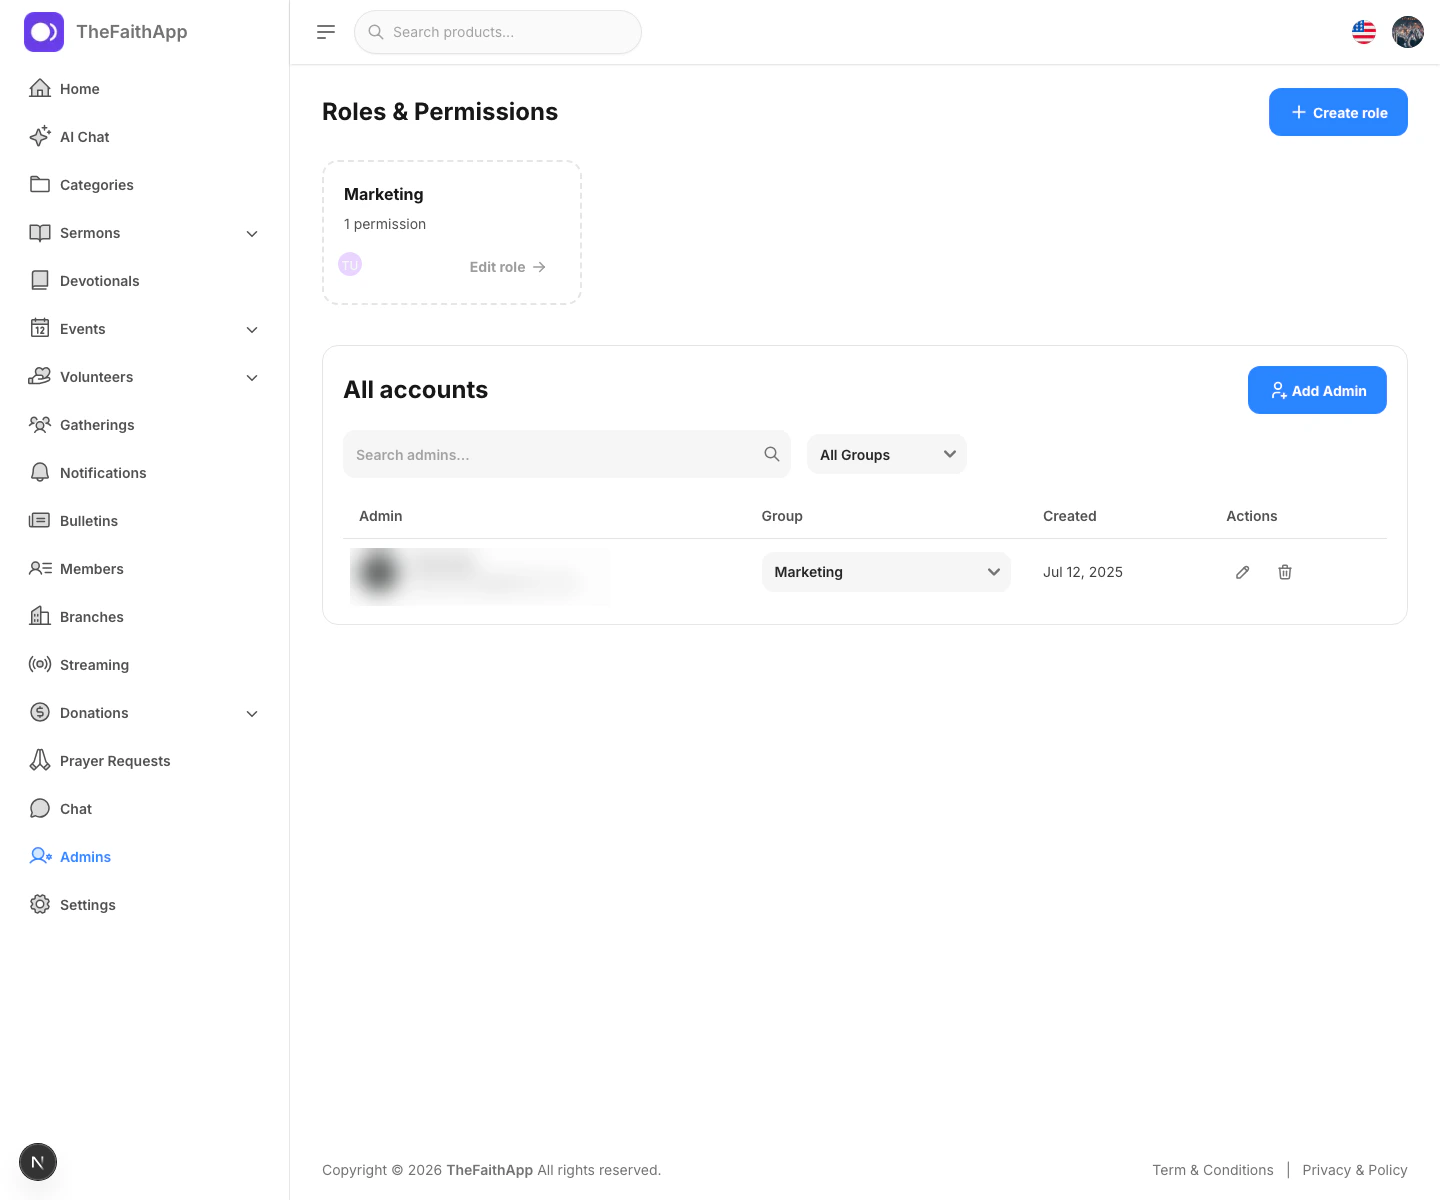
What You Can Do
- Add a new admin account
- Search admin accounts
- Filter by role or group
- Change an admin’s assigned role
- Edit account details
- Delete an admin account when allowed
Steps
- Click
Admins. - Click
Add Admin. - Enter the admin name, email address, role, and password.
- Save the account.
- Use the group dropdown in the table when you want to reassign a role quickly.
- Use the edit action for account updates.
Notes
- The roles section sits above the accounts table on the same page.
- Some group changes or delete actions may be limited to higher-level admins.